Introducing Styler - The Next Generation CSS Builder ⚡️
Super Charge your hashnode blog with Styler
Savio Martin is a 14 year old who spends time building useful products. He is a designer, front-end web developer, and content creator.
Hello Friends 👋
Hey there,its Savio back. I hope you all are doing good. I'm young web dev with an intention to enhance as a successful web developer.
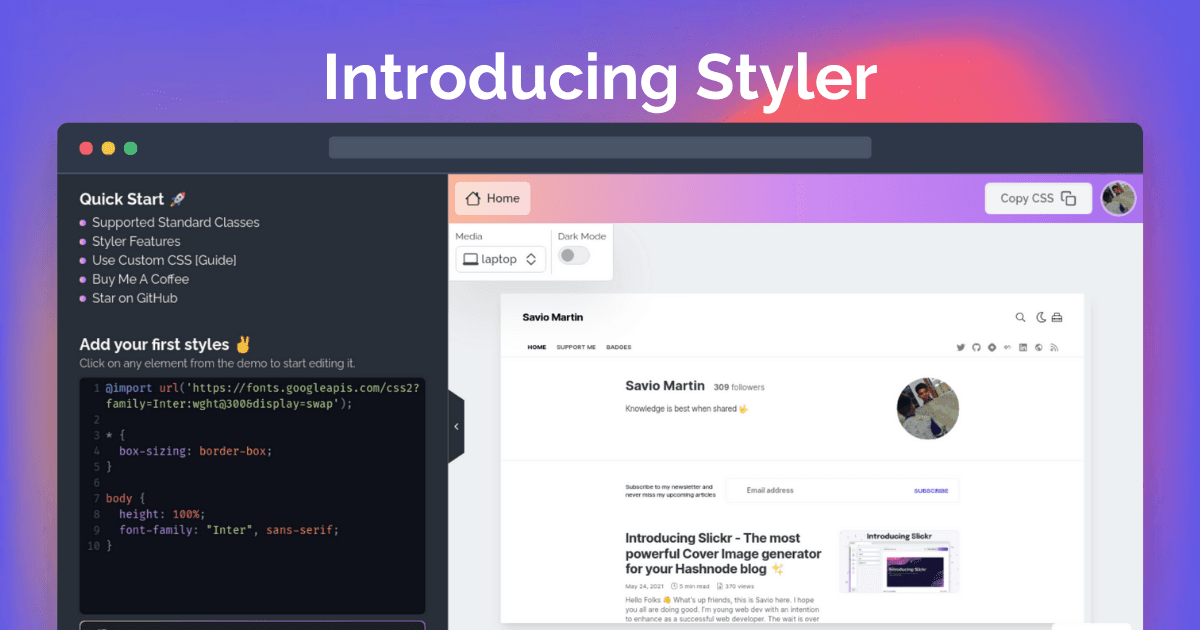
The wait is over 🎉, Introducing you to my new mega web app Styler. Styler is a very useful project targeted to all hashnode users. Styler is my submission for Auth0 x Hashnode Hackathon. I can't wait to show you the amazing features ✨️.
Little Flashback
Hashnode being the best place for developer blogging introduced Custom CSS last year. I'm inspired by how useful it will be in real life. Its what No other blogging platforms could offer and makes hashnode unique. Thant made me think 🤔
Introducing Styler 🎨
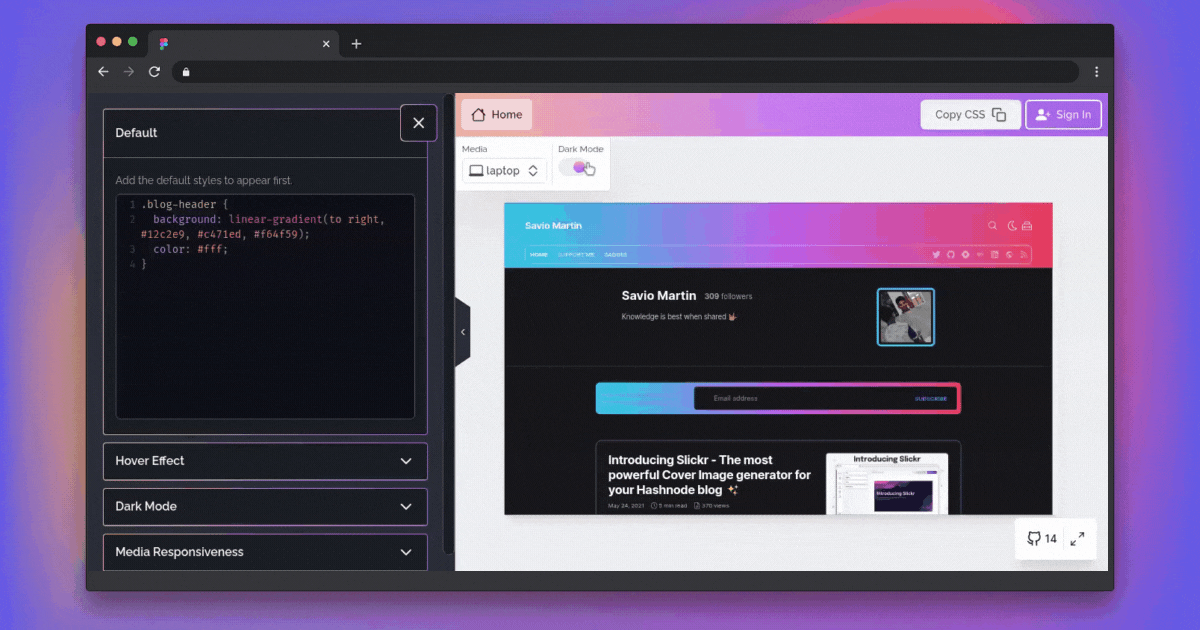
Styler is the next gen custom CSS builder developed to supercharge your hashnode blog. Styler comes with awesome features like Live Preview, Dark Mode Support, Breakpoints support, templates and much more to standout out your blog. You can see live preview and edit everything in real time. When you're done export it to CSS. Its as simple as that. Say hello to Styler 👋
✨️ Inspiration
Hashnode brought Custom CSS feature and soon it became trending. People started playing with it and they enjoyed it. I joined hashnode in the end of 2020, and found Custom CSS is super cool. Indeed, I started playing with it and just loved it.
And I created a Custom CSS for my blog too. Readers started enjoying it. Its not that easy to create Custom CSS. These are the steps needed for it.
- Inspect your page and find class names.
- There is no live preview. We have to reload and reload.
- Adjust brower size for different media (phone, tablet, laptop) is a mess.
- Handling Dark Mode is hard.
- It take a lot of time for this process.
So, that's the exact reason why I built Styler. Auth0 Hackathon was the push 🔥
TL;DR
I have created a short demo video in which I create a super cool Custom CSS code from scratch. (~2 mins), use headphones 🎧
Now, let me show you the amazing features Styler have so far ✌️
Live Preview
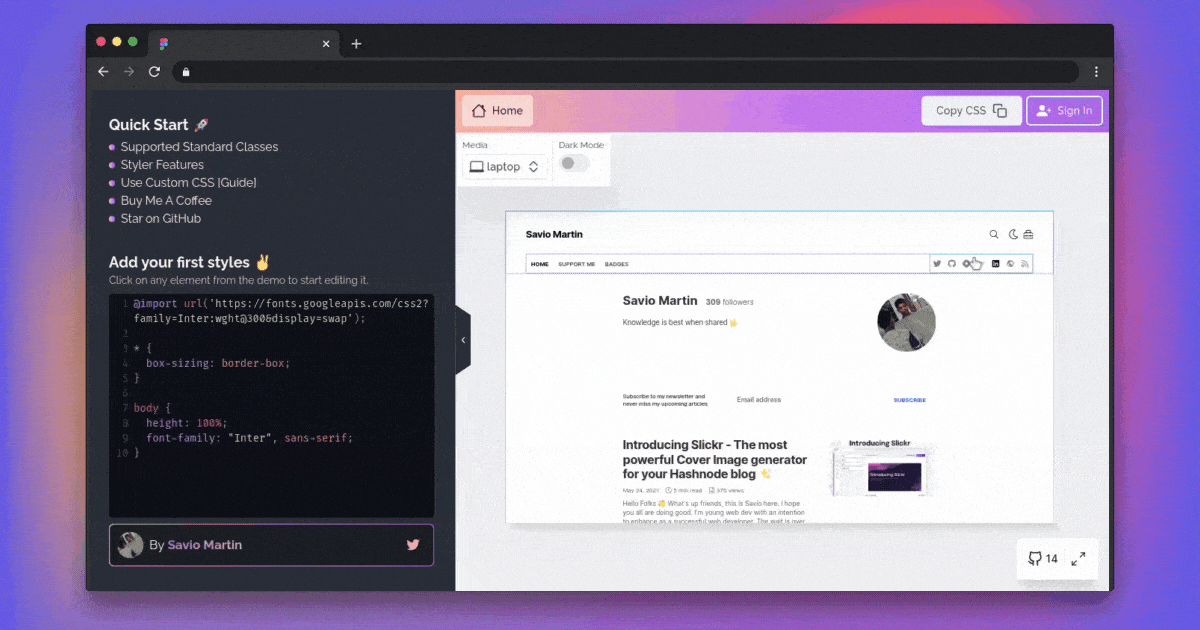
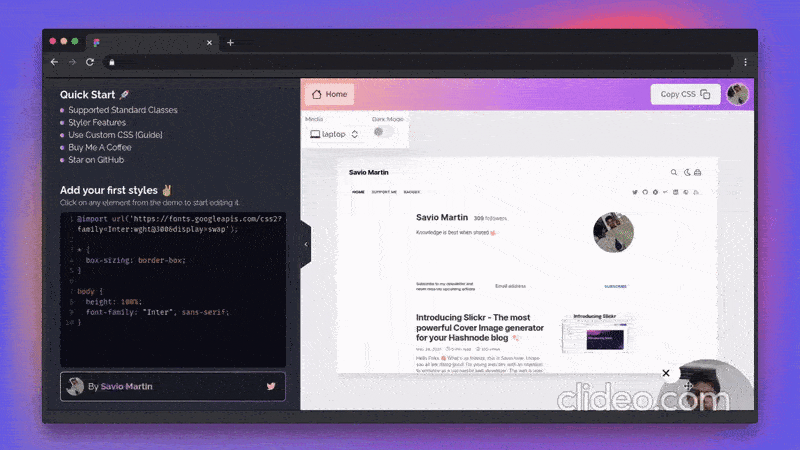
Yep, I know. Live preview makes it super easy to communicate with blog. You can edit and see the changes real time without even reloading. How cool is that?
Ready to Use Templates
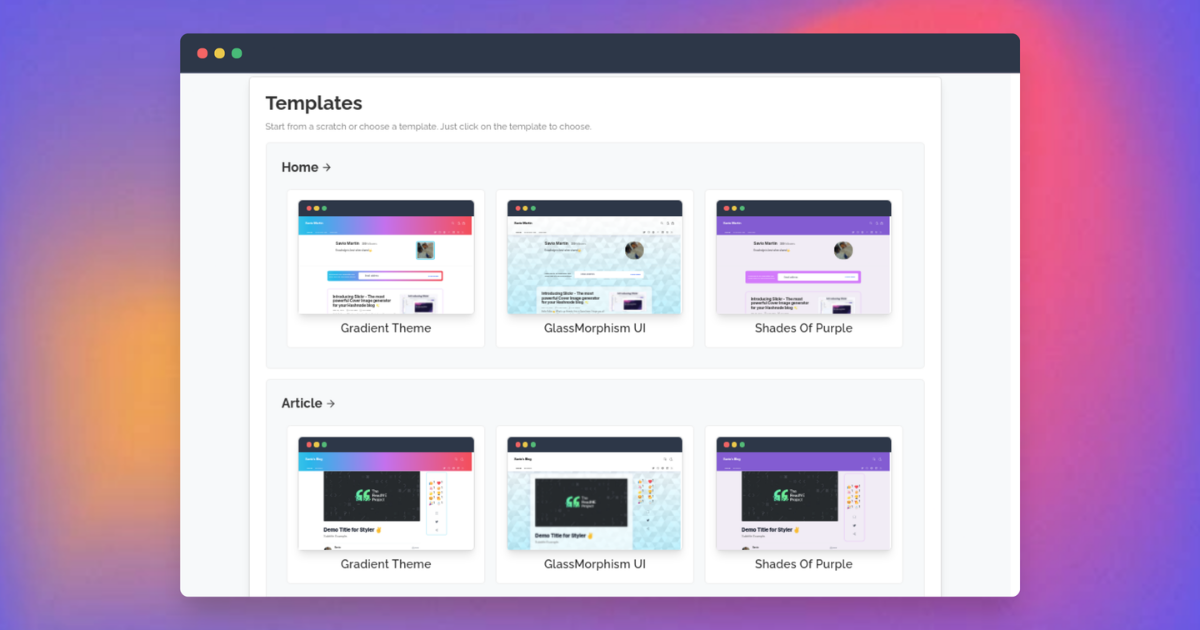
emplates are there 🎉 Yeah, you now don't need to start everything from scratch. If you're interested there are some templates you can start editing with.
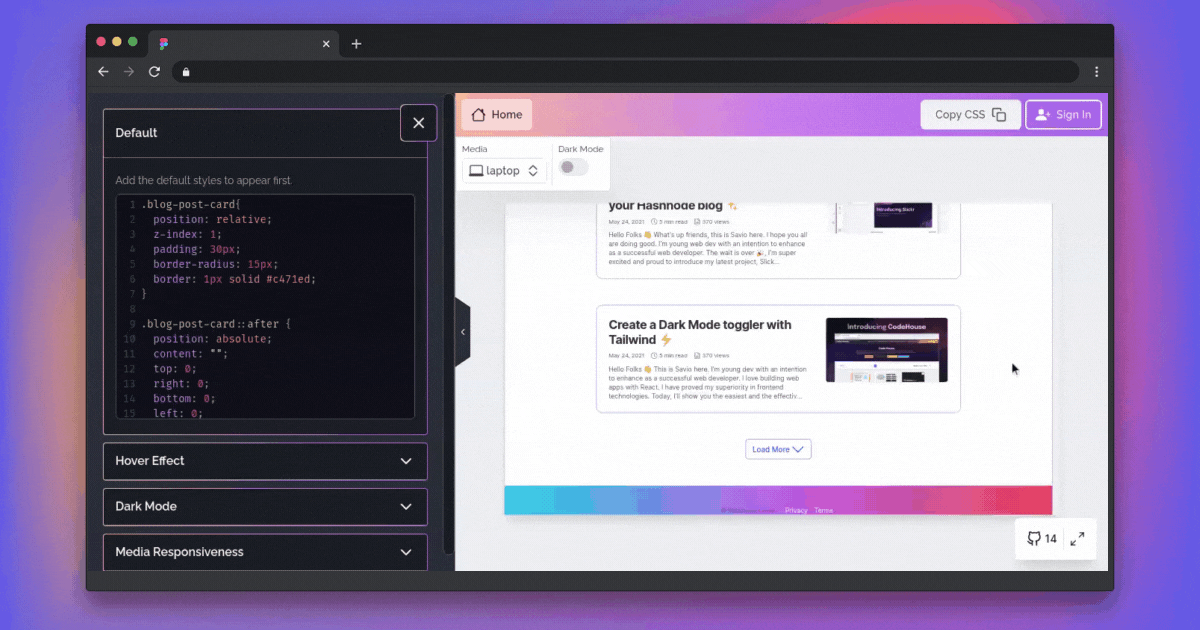
Break Points Support (mobile, tablet, desktop)
You don't have to worry which device you're using. Styler makes it easy to connect with. You can change your code for phone, tablet and laptop. Also, you can test them in real time.
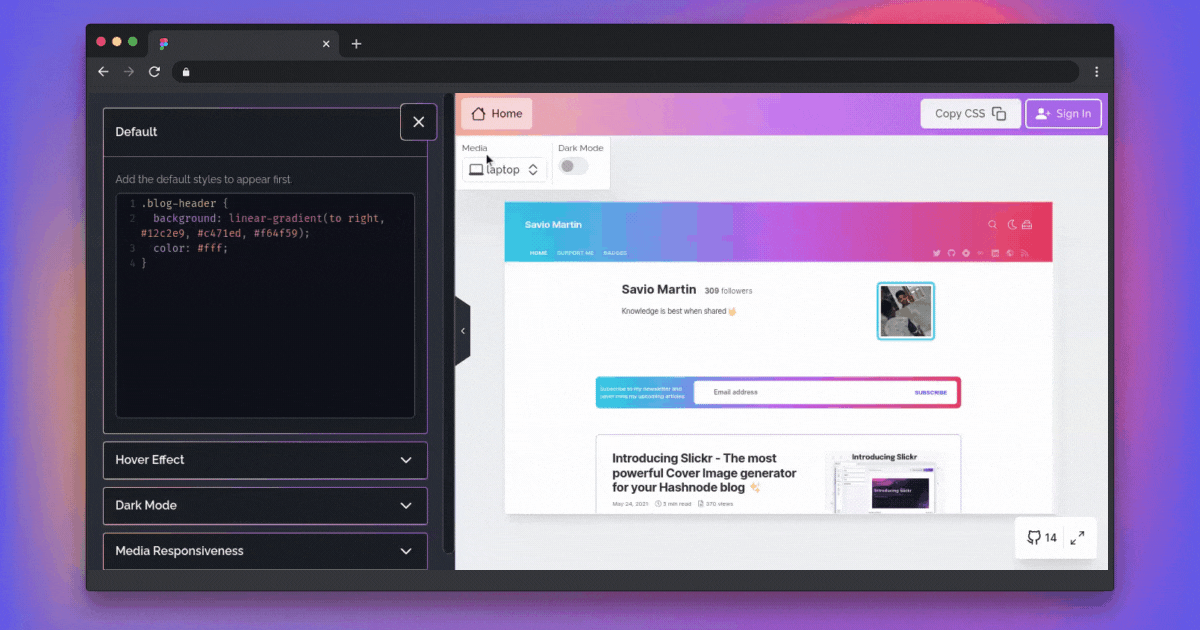
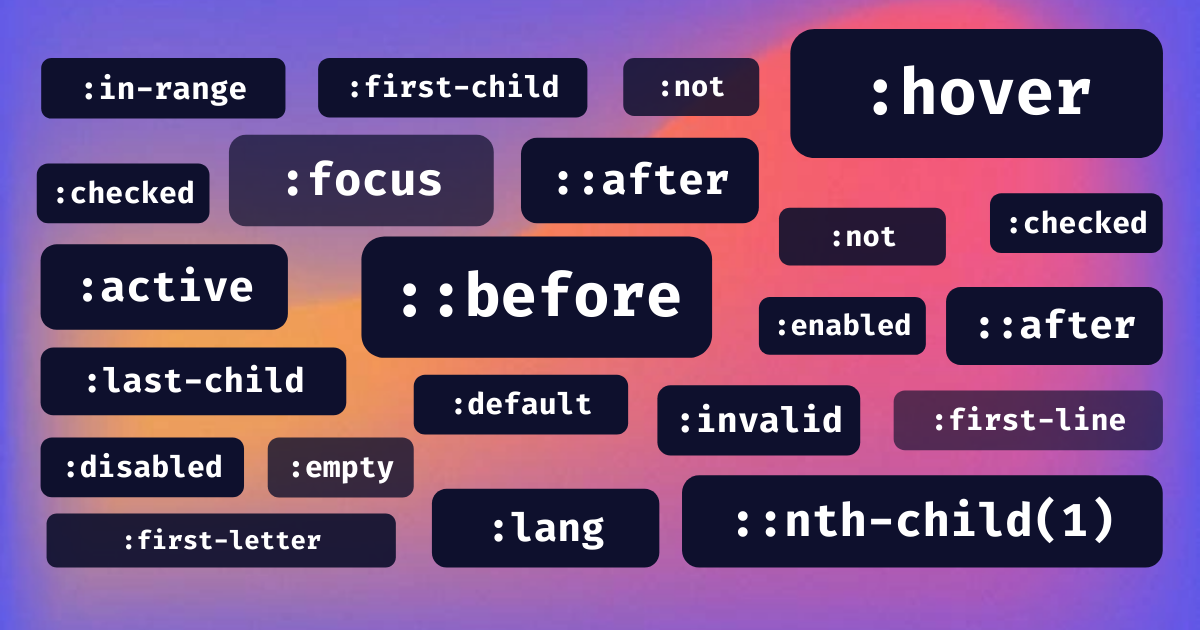
Handle Effects (hover, focus, etc)
Yep, you can handle that too. There is a block dedicated to it. Just click on an element and you'll find the place to add effects.
Dark mode Support
Dark Mode is supported. So, you don't need to worry about what happens to yout element in dark mode. You can add it too.
CSS AutoComplete
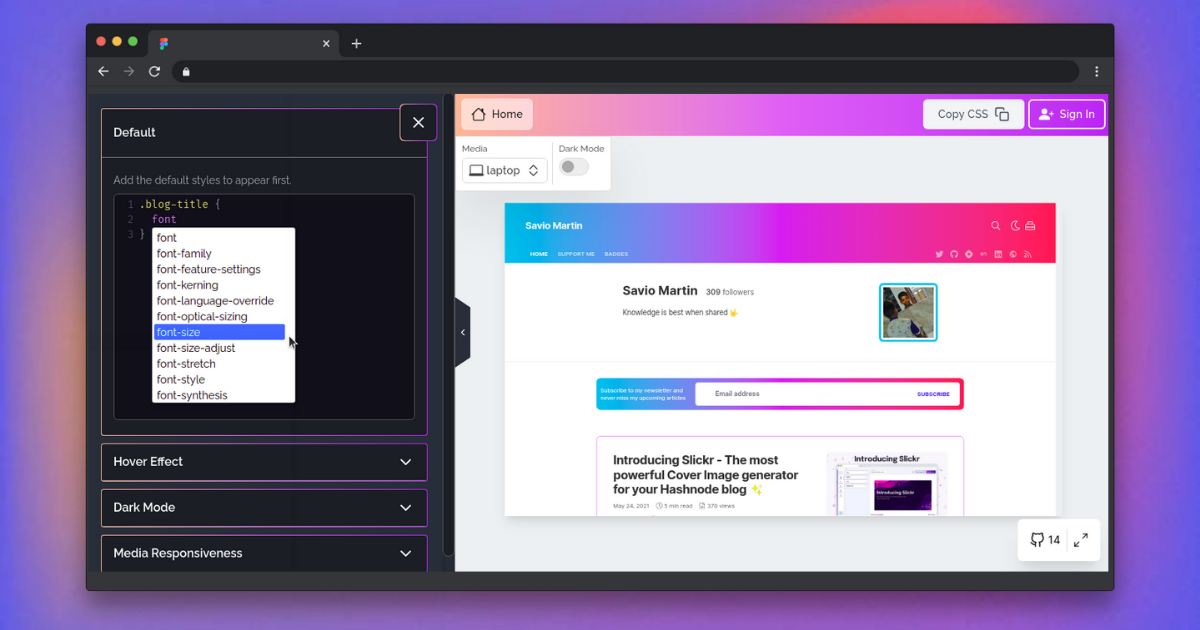
To make your coding faster, we have a built in autocomplete. So, lets be more productive 🔥
Create for 2 pages (Home, Article)
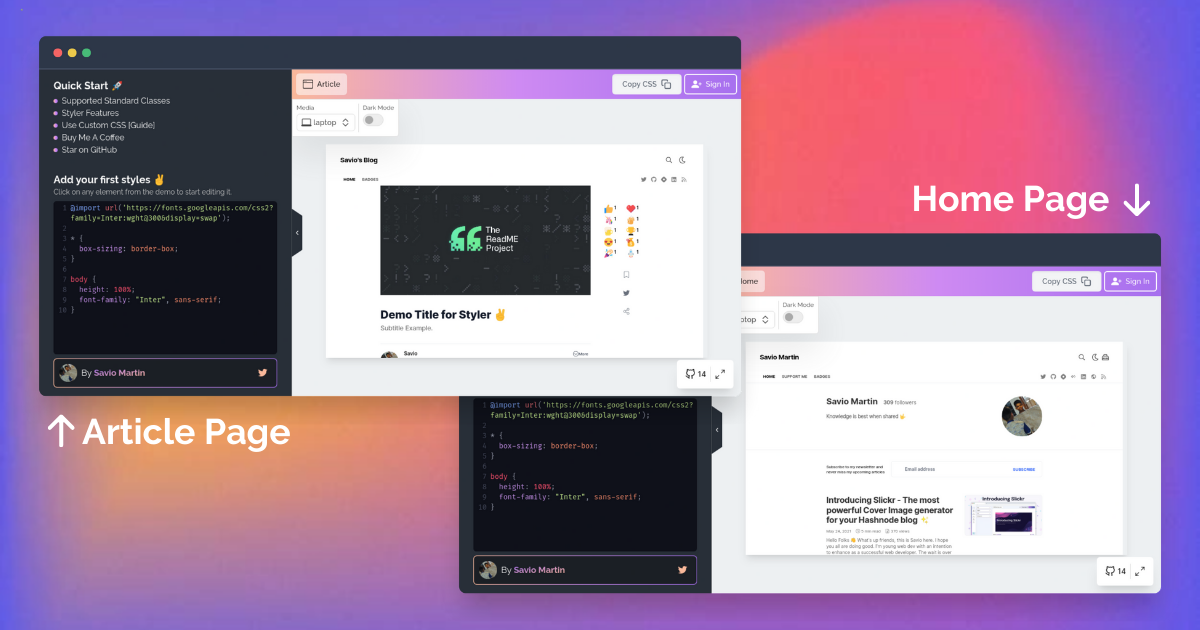
You can currently create Custom CSS for 2 pager. Home page and Article Page. The third page will show up shortly 🙌
Full creative freedom
You have the freedom to try out all CSS stuffs out there. Enjoy creating next level stuffs with it. Its now time to super charge your blog 🔥
Feel free to star ⭐️ the project if you found useful - github.com/saviomaritn/styler
Start using Styler, give your hashnode blog a new look and stay unique. 😎
💡 How to Use Styler
Using Styler is pretty simple but here are some guidelines I'd like to share.
Custom CSS is an ambassador only feature currently. So, make sure you are a hashonde ambassador. Follow this guide to be a hashnode ambassador.
- Go to Home Page of Styler
- Start from blank or choose a template you like.
- Edit your blog as per your wish
- Click on Copy CSS and CSS will be copied to your clipboard.
- Follow the Official Docs by Hashnode on Using Custom CSS
💻 Built with
- Next JS
- Auth0: Complete User Authentication
- react-icons: for icons
- supabase: for database
- headless-ui: for components
- codemirror: for code blocks
- query-string: for parsing query
- Material UI: for components
- Vercel: for hosting
🛠️ Planning, Building, and Deploying
This idea was revolving around my head since the hackathon was announced. I did some preparation before touching the code. I reached out to hashnode team and got connected with them, as I'm gonna work a lot with scraping for a demo blog, I thought it was very necessary. I learned how to scrape it and transform the raw HTML to a productive preice of JS.
I fetched the resources I'd need for it and did a pretty good plan of which how I'd go further. Also, I learned new modules and libraries. Yeah, you can read more of my plans and struggles here 👇
Planning
You know already, everyone prefer notion to plan. I created a checklist and some tables of which how I'd go further. I do believe a good plan is very much important for a good project.
Designing
I didn't used my all time favourite tool Figma much for this. Its just because I already have a design for UI in my mind and I just went on. I'm glad I did well.
Building
The time consuming part arrived. xD It all started by creating a next app.
npx create-next-app -e with-tailwindcss stylerI'm a big fan of tailwind CSS, recently loving it a lot. I'm sticking to it for this project too. I have heard a lot about Auth0, but never got a chance to check it out. Gladly, I checked it and loved it. Its super awesome and super fast. Here is how I connected my Next JS app with Auth0.
First I installed Auth0 for next js module.
npm i @auth0/nextjs-auth0Then its pretty easy, first import
UserProviderwrapper from Auth0 in out_app.jspage.import { UserProvider } from "@auth0/nextjs-auth0";After importing, we just have to wrap it around our component like this 👇
<UserProvider>
    <Component {...props} />
</UserProvider>
Now, we need to create a folder
authinside theapifolder ofpages. Inisdeauthfolder, we should create a new file[...auth0].jsand add the following code 👇import { handleAuth } from "@auth0/nextjs-auth0"; export default handleAuth();Now, you need to fill your
.envwith the things you got from your Auth0 dashboard.AUTH0_SECRET= YOUR_AUTH0_SECRET AUTH0_BASE_URL= YOUR_AUTH0_BASE_URL AUTH0_ISSUER_BASE_URL= YOUR_AUTH0_ISSUER_BASE_URL AUTH0_CLIENT_ID= YOUR_AUTH0_CLIENT_ID AUTH0_CLIENT_SECRET= YOUR_AUTH0_CLIENT_SECRETWohoo!! You're done, a user can login by going to localhost:3000/api/auth/login or logout by localhost:3000/api/auth/logout. How fast was that?
Just create a Sign In button with
hrefto localhost:3000/api/auth/login to start playing with your users. I'm pretty impressed by how fast it is and I feel like I should knew this earlier. This is super cool.Now, let me show you some other quick snippets I used. Here is the one I used to created the Fit to Window feel.
const resizeCoverImage = () => {
  const iframe = document.querySelector("#iframe");
  const container = document.querySelector(".playground");

  const maxWidth = iframe.offsetWidth;
  const maxHeight = iframe.offsetHeight;

  const width = container.offsetWidth;
  const height = container.offsetHeight;

  let scale; // scale to be used

  if (width >= maxWidth && height >= maxHeight) {
      iframe.style.transform = "";
      return;
  }

  scale = Math.min(width / maxWidth, height / maxHeight); // trick to get scale

  iframe.style.transform = `scale(${scale})`; // transform scale applied
};
Here the snippet I used to handle the
onclickinside theiframe. This was new to me.useEffect(() => { let iframe = document.getElementById("iframe").contentWindow.document; if (iframe) { iframe.body.onclick = function(e) { // do stuff } } })If you're wondering how Am I changing the look and feel on the
iframe. Here it is how 👇useEffect(() => { let style = document .getElementById("iframe") .contentWindow.document.getElementById("style"); // get style element with id from Iframe if (style) { style.innerHTML = CSSCode; // set inerHtml for style element } }, [CSSCode]);The whole build process is far longer, So, I'm stopping here. Checkout Styler on Github, to learn more on these stuffs.
Deploying
As usual, I decided to stick with my all-time favorite Vercel, I pretty much use it to host all my apps. In fact Next JS is best to host with Vercel.
Try out Styler: styler.vercel.app,
Checkout the Styler on Github: https://github.com/saviomartin/styler
🧐 Challenges
| Challenge | Solution |
| Fit to Window | Math.min(w / maxW, h / maxH) trick |
| Store Templates | Made use of Supabase |
| FullScreen | Used screenfull module |
| demo homepage and article | scraped my own page |
| handling Media Breakpoints | Used iframe for it |
| Grab Content from Iframe | made possible by iframe.contentWindow.document |
| Dark Mode fro demo | appended a .dark class accordingly |
🌈 What's next
Styler is the most hardest project I have ever made. I have ruined 2 full days to fix a 1 line bug for it. Still, I'm happy that I could complete Styler by the best. Here is the roadmap of the future of Styler 🤞
- history of previous codes
- Share preview URLs
- Live Collaborate with partner
- More Templates
- Better Position Tracker
- Change the default preview page with users own page
🍰 Contributing
Please contribute using GitHub Flow. Create a branch, add commits, and open a pull request.
Please read
CONTRIBUTINGfor details on ourCODE OF CONDUCT, and the process for submitting pull requests to us.
🛡️ Licensed under MIT
Example
The best way to test Styler is to test on my blog itself right? Yes, I have used Styler to create this UI you're seeing right now. You liked it right?
Hashnode prefers to only write CSS for the standard classes. I have done a bit more things my blog. You can also do it on Styler. Here are all the standard classes
👀 Wrapping Up
Thanks for checking out Styler. I hope you enjoyed my project. I'd love to hear feedback and thoughts on Styler. Share on Twitter, tag me @SavioMartin7
🌎 Lets connect
🎸 Feedback
Feedback helps to improve Styler. I'd love to hear feedback and thoughts on Styler. Looking forward to what you think on my app.